Navigating the 6-Month Feeding Milestone: A Step-by-Step Guide

Navigating the 6-month feeding milestone involves introducing solid foods alongside breast milk or formula, starting with simple purees and gradually increasing textures and variety while monitoring for allergies and ensuring a balanced nutritional intake for healthy development.
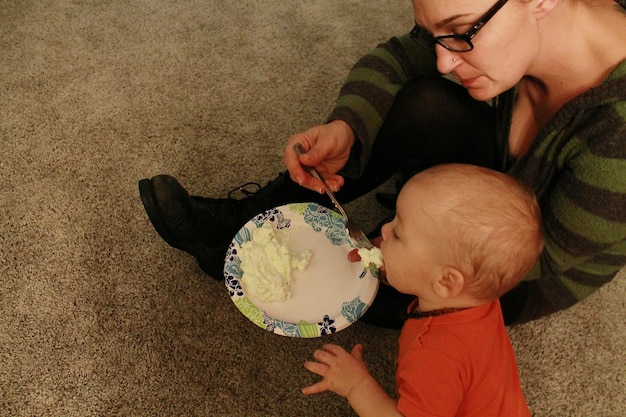
Embarking on the 6-month feeding adventure can feel like a huge step. This is the time when your little one starts exploring the world of solid foods alongside their regular milk feeds. This guide, navigating the 6-month feeding milestone, will provide you with a step-by-step approach, helping you introduce solids with confidence and joy.
Understanding the 6-Month Feeding Milestone
The transition to solid foods around six months is a crucial developmental stage. It’s not just about introducing new flavors; it’s about developing motor skills, exploring textures, and laying the foundation for a lifetime of healthy eating habits. But why six months? Understanding the reasons behind this timeline is key to a successful start.
Developmental Readiness
At six months, most babies exhibit signs of developmental readiness for solid foods. These include the ability to sit upright with support, good head control, and an interest in food. Observing these milestones signals that your baby’s digestive system is also maturing, making it more capable of processing foods other than breast milk or formula.
Nutritional Needs
While breast milk or formula continues to be a primary source of nutrition, around six months, babies begin to need additional nutrients, particularly iron and zinc, which may not be adequately supplied by milk alone. Introducing iron-rich foods like fortified cereals or pureed meats helps meet these increasing nutritional demands.
- Sitting Upright: Babies should be able to sit with minimal support, indicating sufficient core strength.
- Head Control: Strong head and neck control are essential for safely swallowing food.
- Interest in Food: Showing curiosity about what others are eating is a clear sign of readiness.
Introducing solids isn’t just about nutrition and readiness; it’s also about exploration and sensory development. This is a critical time for babies to learn about different tastes and textures, which can shape their preferences later in life. Embrace this stage as a sensory adventure.
First Foods: What to Start With
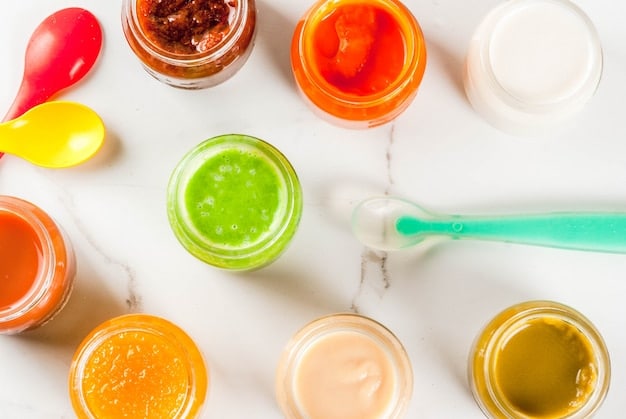
Choosing the right first foods can set the stage for a positive feeding experience. The goal is to start with simple, easily digestible foods that are low in allergens. Single-ingredient purees are generally recommended, allowing you to monitor for any adverse reactions or allergies.
Recommended First Foods
Common first foods include iron-fortified infant cereal mixed with breast milk or formula, pureed sweet potatoes, carrots, butternut squash, avocado, and bananas. These options are mild in flavor, easy to digest, and packed with essential nutrients.
Introducing One at a Time
When introducing new foods, it’s crucial to follow the “one at a time” rule. This means offering a single new food for 3-5 days before introducing another. This allows you to identify any potential allergic reactions, such as rash, hives, diarrhea, or vomiting.
- Iron-Fortified Cereal: A good source of iron and easily digestible.
- Sweet Potatoes: Naturally sweet and rich in vitamins.
- Avocado: Healthy fats and a smooth texture are ideal for babies.
Starting with simple, single-ingredient purees ensures that you can easily identify and address any potential allergies. This approach also allows your baby to gradually adjust to new flavors and textures, making the transition smoother and more enjoyable.
Step-by-Step Guide to Introducing Solids
The process of introducing solids should be gradual and patient. It’s not about replacing breast milk or formula right away; rather, it’s about complementing their diet and introducing new experiences. Here’s a step-by-step guide to help you navigate this process with ease.
Week 1-2: First Tastes
Start by offering a small amount of the chosen puree, about 1-2 teaspoons, once a day. Choose a time when your baby isContent da FAQ:
[Título da seção FAQ em en-US]
▼
[Resposta 1 em en-US – 40-60 palavras]
▼
[Resposta 2 em en-US – 40-60 palavras]
▼
[Resposta 3 em en-US – 40-60 palavras]
▼
[Resposta 4 em en-US – 40-60 palavras]
▼
[Resposta 5 em en-US – 40-60 palavras]
“`
**6. Conclusão Geral do Artigo (Obrigatório – APÓS a seção FAQ):**
* Crie uma seção final com `
[Título da Conclusão em en-US]
`. Por exemplo, se en-US for Inglês, o título deve ser `
Conclusion
`.
* Desenvolva um parágrafo de conclusão para o artigo inteiro. Este parágrafo deve vir *imediatamente* após a seção de FAQ, sem espaçamento excessivo entre eles.
**7. Inclusão de botão (Obrigatório – No final do Post):**
* Crie um botão com a estrutura exatamente igual ao exemplo abaixo:
* Código HTML do botão (Use EXATAMENTE esta estrutura, apenas traduzindo o texto Read more content na linguagem en-US e Baby Feeding Guides pelo nome da categoria atual ‘Baby Feeding Guides’, formatando-a para URL – substituindo espaços por hífens e convertendo para minúsculas):
“`html
“`
* IMPORTANTE: Para categorias com múltiplas palavras, substitua os espaços por hífens no URL. Por exemplo, se a categoria for “DIY Fashion”, o URL deve ser “/category/diy-fashion”.
**8. Distribuição de Palavras (Total: 2000-2500) – VERIFIQUE ESTA CONTAGEM AO FINALIZAR:**
* Resumo abstrativo: 30-50 palavras
* Introdução: 100-150 palavras
* Corpo principal (6-7 seções H2): 1500-1800 palavras
* Tabela resumo: ~50 palavras
* FAQ: 250-300 palavras
* Conclusão: 50-100 palavras
* TOTAL: 2000-2500 palavras (verifique e ajuste se necessário)
VERIFICAÇÃO FINAL DE NEGRITO: Após terminar o artigo, faça uma revisão completa e certifique-se de que TODO negrito esteja usando a sintaxe HTML (`palavra`) e NUNCA a sintaxe Markdown (`**palavra**`). Esta é uma exigência crítica para o funcionamento correto do artigo no WordPress.
Lembre-se, o idioma de TODO o conteúdo deve ser en-US.
O foco geográfico é US.
O tema central é Navigating the 6-Month Feeding Milestone: A Step-by-Step Guide dentro da categoria Baby Feeding Guides.
Gere conteúdo original e de alta qualidade com EXATAMENTE 2000-2500 palavras totais.
“`html
Navigating the 6-month feeding milestone involves introducing solid foods alongside breast milk or formula, starting with simple purees and gradually increasing textures and variety while monitoring for allergies and ensuring a balanced nutritional intake for healthy development.
Embarking on the 6-month feeding adventure can feel like a significant step. This is the time when your little one starts exploring the world of solid foods alongside their regular milk feeds. This guide, navigating the 6-month feeding milestone, will provide you with a step-by-step approach, helping you introduce solids with confidence and joy.
Understanding the 6-Month Feeding Milestone
The transition to solid foods around six months is a crucial developmental stage. It’s not just about introducing new flavors; it’s about developing motor skills, exploring textures, and laying the foundation for a lifetime of healthy eating habits. But why six months? Understanding the reasons behind this timeline is key to a successful start.
Developmental Readiness
At six months, most babies exhibit signs of developmental readiness for solid foods. These include the ability to sit upright with support, good head control, and an interest in food. Observing these milestones signals that your baby’s digestive system is also maturing, making it more capable of processing foods other than breast milk or formula.
Nutritional Needs
While breast milk or formula continues to be a primary source of nutrition, around six months, babies begin to need additional nutrients, particularly iron and zinc, which may not be adequately supplied by milk alone. Introducing iron-rich foods like fortified cereals or pureed meats helps meet these increasing nutritional demands.
- Sitting Upright: Babies should be able to sit with minimal support, indicating sufficient core strength.
- Head Control: Strong head and neck control are essential for safely swallowing food.
- Interest in Food: Showing curiosity about what others are eating is a clear sign of readiness.
Introducing solids isn’t just about nutrition and readiness; it’s also about exploration and sensory development. This is a critical time for babies to learn about different tastes and textures, which can shape their preferences later in life. Embrace this stage as a sensory exploration for your child.
First Foods: What to Start With
Choosing the right first foods can set the stage for a positive feeding experience. The goal is to start with simple, easily digestible foods that are low in allergens. Single-ingredient purees are generally recommended, allowing you to monitor for any adverse reactions or allergies.
Recommended First Foods
Common first foods include iron-fortified infant cereal mixed with breast milk or formula, pureed sweet potatoes, carrots, butternut squash, avocado, and bananas. These options are mild in flavor, easy to digest, and packed with essential nutrients.
Introducing One at a Time
When introducing new foods, it’s crucial to follow the “one at a time” rule. This means offering a single new food for 3-5 days before introducing another. This allows you to identify any potential allergic reactions, such as rash, hives, diarrhea, or vomiting.
- Iron-Fortified Cereal: A good source of iron and easily digestible.
- Sweet Potatoes: Naturally sweet and rich in vitamins.
- Avocado: Healthy fats and a smooth texture are ideal for babies.
Starting with simple, single-ingredient purees ensures that you can easily identify and address any potential allergies. This approach also allows your baby to gradually adjust to new flavors and textures, making the transition smoother and more enjoyable.
Step-by-Step Guide to Introducing Solids
The process of introducing solids should be gradual and patient. It’s not about replacing breast milk or formula right away; rather, it’s about complementing their diet and introducing new experiences. Here’s a step-by-step guide to help you navigate this process with ease.
Week 1-2: First Tastes
Start by offering a small amount of the chosen puree, about 1-2 teaspoons, once a day. Choose a time when your baby is well-rested and content, usually between milk feeds. Observe their reaction – are they curious, hesitant, or disinterested?
Week 3-4: Increasing Quantity and Variety
If your baby tolerates the first food well, gradually increase the quantity to 2-3 tablespoons per feeding. You can also start introducing a second single-ingredient puree. Remember to continue offering only one new food every 3-5 days to monitor for allergies.
- Be Patient: It may take multiple attempts for your baby to accept a new food.
- Offer Water: Provide small sips of water from a cup to help with swallowing.
- Create a Routine: Establish a regular feeding schedule to help your baby anticipate meal times.
Remember, every baby is different, and some may take to solids more readily than others. The key is to be patient, observant, and responsive to your baby’s cues. This early introduction to solids is about learning and exploration, not about forcing your baby to eat.
Understanding Baby-Led Weaning
Baby-led weaning (BLW) is an alternative approach to introducing solids where babies are offered soft, finger-sized pieces of food from the start, allowing them to self-feed and explore textures at their own pace. While BLW isn’t for everyone, it can offer some benefits.
Benefits of Baby-Led Weaning
BLW can promote self-regulation of food intake, as babies learn to listen to their own hunger and fullness cues. It also encourages the development of fine motor skills and allows babies to participate more actively in meal times with the family.
Safety Considerations
If you choose to pursue BLW, it’s crucial to offer foods that are soft and easy to chew, avoiding small, hard foods that could pose a choking hazard. Always supervise your baby while they are eating and ensure they are sitting upright.
- Soft Foods: Offer cooked vegetables, soft fruits, and well-cooked meats.
- Finger-Sized Portions: Cut food into strips that are easy for babies to grasp.
- Supervision: Always supervise your baby closely during meal times.
Baby-led weaning can be a rewarding experience for both you and your baby. It promotes independence and self-discovery, allowing your baby to explore the world of food in a safe and supportive environment. Always consult with your pediatrician before starting BLW.
Addressing Common Concerns
Introducing solids often comes with questions and concerns. Here are some common issues parents face and how to address them:
Allergies
Food allergies are a major concern for many parents. As mentioned earlier, introducing new foods one at a time and monitoring for reactions is crucial. Common allergens include milk, eggs, peanuts, tree nuts, soy, wheat, fish, and shellfish. If you suspect an allergy, consult with your pediatrician or an allergist.
Constipation
Some babies may experience constipation when starting solids. To help prevent this, offer fiber-rich foods like pureed prunes, pears, or peas. Ensure your baby is also getting enough fluids, either through breast milk, formula, or small sips of water.
If your child is not eating enough, consult your pediatritian.
- Fiber-Rich Foods: Prunes, pears, and peas can help relieve constipation.
- Adequate Fluids: Ensure your baby is well-hydrated.
- Consult a Doctor: If you suspect an allergy or constipation persists, seek medical advice.
Addressing these common concerns proactively can help ensure a smoother transition to solids. Remember, every baby is different, and what works for one may not work for another. Trust your instincts and seek professional advice when needed.
Creating a Positive Feeding Environment
The environment in which you introduce solids can significantly impact your baby’s experience. Creating a positive and relaxed atmosphere can help foster a healthy relationship with food from the start.
Make Meal Times Enjoyable
Turn meal times into a fun and interactive experience. Sing songs, make funny faces, and talk to your baby about the food. Avoid distractions like screens and focus on creating a positive connection with your baby.
Be Patient and Supportive
Some days your baby may be more interested in trying new foods than others. Be patient and supportive, and never force your baby to eat. Let them explore the food at their own pace and trust that they will eat when they are hungry.
- Minimize Distractions: Turn off screens and create a calm environment.
- Be Present: Focus on connecting with your baby during meal times.
- Offer Encouragement: Provide positive reinforcement and praise.
By creating a positive and supportive feeding environment, you can help your baby develop a healthy and enjoyable relationship with food. Remember, it’s about more than just nutrition; it’s about creating positive memories and building a foundation for a lifetime of healthy eating habits.
| Key Point | Brief Description |
|---|---|
| 👶 Readiness Signs | Look for head control, sitting upright, and interest in food. |
| 🍎 First Foods | Start with single-ingredient purees like sweet potato or avocado. |
| 🥄 Introducing Solids | Introduce one new food at a time to check for allergies. |
| 👍 Positive Environment | Make meal times fun and be patient with your baby as they explore new foods. |
FAQ
▼
Great first foods include iron-fortified cereals, pureed sweet potatoes, avocado, bananas, and cooked and pureed carrots. They are easy to digest and low in allergens, making them ideal for your baby’s first meals.
▼
Signs of readiness include being able to sit up with support, having good head control, showing an interest in food by watching you eat, and opening their mouth when offered a spoon. These milestones suggest your baby is ready.
▼
Start with just a few teaspoons once a day, gradually increasing to 2-3 tablespoons as your baby gets used to it. Remember, breast milk or formula should remain the primary source of nutrition at this age.
▼
Don’t force it. Try again another day or offer a different food. It may take multiple attempts for a baby to accept new foods. Be patient and continue to offer a variety of options.
▼
Introduce one new food at a time, waiting 3-5 days before introducing another. This helps you identify possible allergic reactions. Start with small amounts and watch for any signs of allergies like rash, hives, or diarrhea.
Conclusion
Congratulations on reaching this exciting milestone! Introducing solids is a journey, and every baby is unique. By following these step-by-step guidelines and trusting your instincts, you can help your little one develop healthy eating habits and a positive relationship with food. Enjoy this special time of exploration and discovery with your baby!


")


")